
How to build connectors to on-premise services for workflow automation

Successful organizations rely on software applications such as accounts payable, enterprise resource planning (ERP), customer relationship management (CRM), and payroll systems to conduct their business. These disparate applications must communicate and share data, and systems may be spread across multiple clouds and on-prem environments. As such, integration between these applications becomes a full-time endeavor.
Consider an e-commerce application that facilitates online ordering and stores customer purchase information. This application needs to sync purchasing history and preferences with the CRM application to enable the marketing team to launch personalized campaigns. It must also transfer sales data to the accounting software for invoicing and financial reporting. Additionally, the e-commerce application needs to communicate with the inventory management system to display the current inventory and update the inventory system when a customer purchases an item.
Or consider a development team that wants to build workflows to automate defect management within their CI/CD pipelines. The team stores its open-source project code in GitHub and its proprietary product code in an on-prem GitLab instance and needs to connect both of these to its on-prem Jira instance for automated issue management. Some development teams must coordinate connectivity to these resources across geographic boundaries.
While these teams could write scripts to perform some or all of these steps, manual handoffs between systems are time-consuming and error-prone. Additionally, building and maintaining in-house integration solutions is costly.
Integrate apps, APIs, and databases with connectors
Instead, efficient businesses rely on low-code automation solutions and iPaaS (Integration Platform as a service) providers like Retool, UiPath, Zapier, and Workato that streamline their workflows with reusable blocks and components. These solutions allow teams to stitch together scripts, database queries, API calls—even direct interaction with an application through its web interface—to turn manual, one-off processes into repeatable, business-class operations accessible via web apps, mobile apps, and custom forms. iPaaS applications replace complex scripts and manual processes with drag-and-drop interfaces and pre-built connectors for accessing popular data sources such as Salesforce, SAP, and even Google Sheets.
Connect to on-prem resources using ngrok
Building connectors to cloud-based resources and publicly hosted solutions is likely straightforward. But when customer workflows need access to applications like GitLab, BitBucket, and Jira instances deployed in customer VPCs or on-prem or require access to local databases such as PostgreSQL, it becomes daunting.
Typically, supporting workflows with on-prem resources would involve asking customers to open firewall ports or manage site-to-site VPNs, leading to lengthy approval processes with each customer's IT department.
Or you could use ngrok.
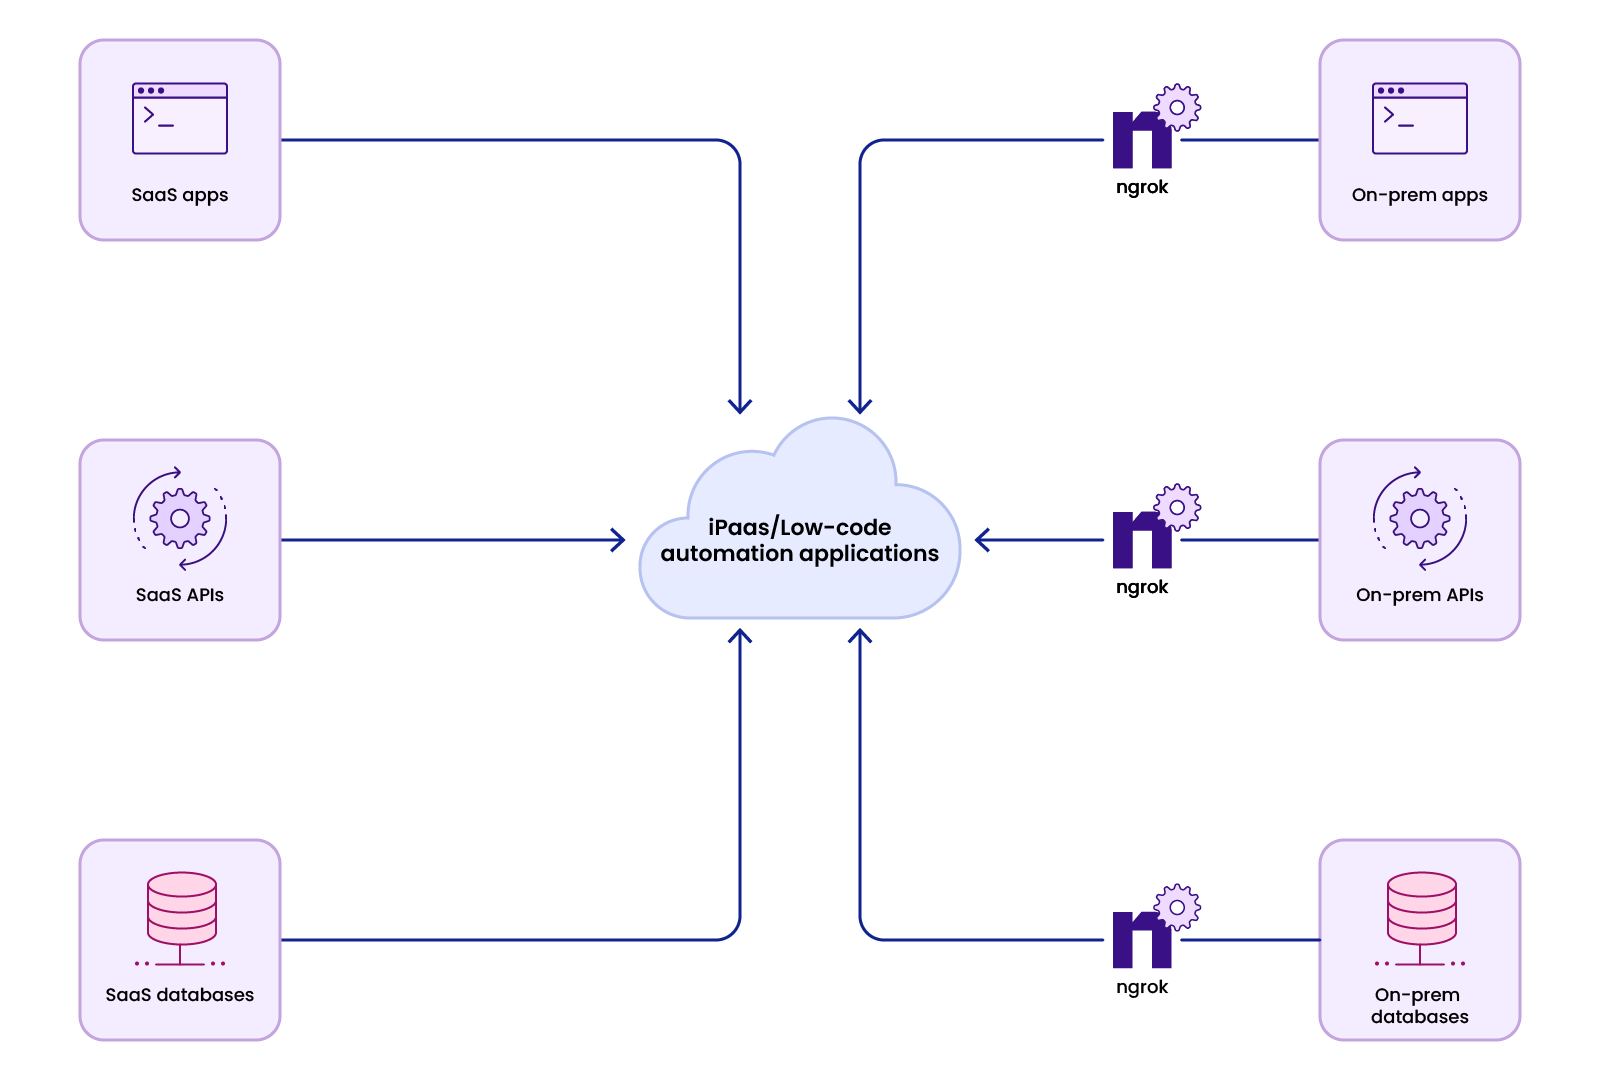
ngrok equips iPaaS and low-code automation vendors to provide connectivity to applications and services running on-prem or in customer VPCs without asking customers to make network changes. Instead, customers run a lightweight agent that forwards traffic from endpoints created at the ngrok edge to the locally running service, API, or database.
Many iPaaS vendors and low-code automation solutions already require customers to run a custom script in their network to facilitate integrations. With ngrok, you can integrate connectivity directly into your applications using ngrok's SDKs and avoid running a separate ngrok agent.
Additionally, the ngrok Operator allows connectivity to services running in your customer’s Kubernetes environment.
Once ngrok is running in your customer’s network—whether via the agent, the ngrok Operator, or your own custom code that utilizes an SDK—you can safely start and stop tunnels in your customer’s network remotely and programmatically.
You can start each ngrok instance using a separate auth token and add carefully scoped Access Control Lists (ACLs) to prevent one customer’s workflow from starting and stopping tunnels in a different customer’s environment.
Example #1: Connect to on-prem Jira, BitBucket, and GitLab APIs
Workflows created by development teams often must connect external applications to local Jira, BitBucket, and GitLab API instances, and many low-code automation solutions provide pre-built connectors for these applications. If you’re a development team using an automation platform that doesn’t offer pre-built connectors or a low-code automation vendor looking to develop new connectors, follow these steps to connect to on-prem Jira, GitLab, and BitBucket APIs using ngrok. To get started, log in or sign up for a free ngrok account and reserve an ngrok HTTP domain (or you can set up a custom domain).
Install the ngrok agent in the same environment as the instance you wish to connect to, whether that’s your local network, a customer network, or a remote development environment, and create a bot user so you can create an auth token independent of any particular team member.
Now, create an agent auth token, and select the bot user you created in the previous step as the owner.
Run ngrok config check from a terminal to determine the default location for the ngrok.yaml config file for your operating system. Create an ngrok.yaml config file like the one below in the default location for your operating system, substituting the appropriate values for authtoken, domain, and addr. This example creates three separate tunnels to Jira, GitLab, and BitBucket using the default port for each application’s API.
If you installed the agent on a machine other than where you installed Jira, GitLab, or BitBucket, you'll need to provide a hostname or IP address. Otherwise, you can use localhost or specify the port only, and the host will default to localhost.
#config.yml

version: "2"
authtoken: 2jfKajKESrHbU9Sz982qPv6aTu6_58DJiJaaxxxxxxxxxxxxx

tunnels:
  jira:
    proto: http
    domain: my-jira.ngrok.dev
    addr: 8080

  gitlab:
    proto: http
    domain: my-gitlab.ngrok.dev
    addr: 80

  bitbucket:
    proto: http
    domain: my-bitbucket.ngrok.dev
    addr: 7990
Now you can start the agent by running ngrok from a terminal! You can also access the Jira, GitLab, or BitBucket instance using the domain you specified in the config. No port is required since it’s part of the tunnel specification.
This example gets you started with using ngrok to connect to local Jira, GitLab, and BitBucket APIs, but you could use these steps to connect to any on-prem API. If you’re ready to go deeper, check out the following step-by-step guides:
Example #2: Connect to on-prem PostgreSQL
In addition to connecting to APIs, many workflows need access to on-prem databases like PostgreSQL. The steps for using ngrok to connect to databases are similar to those above for connecting to APIs. You’ll reserve a TCP address rather than an HTTP address. To get started in this example you'll also need to log into ngrok or sign up for a free ngrok account.
Once you're in, reserve an ngrok TCP address and install the ngrok agent in the same environment as the database you wish to connect to, whether that’s your local network, a customer network, or a remote development environment.
Next, you'll need to create a bot user so you can create an auth token independent of any particular team member, create an agent auth token, and select the bot user you created in the previous step as the owner.
Now, as in the previous example, you can run ngrok config check from a terminal to determine the default location for the ngrok.yaml config file for your operating system. Run ngrok config check from a terminal to determine the default location for the ngrok.yaml config file for your operating system. Create an ngrok.yaml config file like the one below in the default location for your operating system, substituting the appropriate values for authtoken, domain, and addr. This example creates a TCP tunnel to a PostgreSQL database running on the default port.
If you installed the agent on a machine other than where you installed Jira, GitLab, or BitBucket, you'll need to provide a hostname or IP address. Otherwise, you can use localhost or specify the port only, and the host will default to localhost.
#config.yml

version: "2"
authtoken: 2jfKajKESrHbU9Sz982qPv6aTu6_58DJiJaaxxxxxxxxxxxxx
tunnels:
  postgres:
    proto: tcp
    domain: 9.tcp.ngrok.io:24691
    addr: 5432
You can now connect to the PostgreSQL database using the TCP address you reserved and specified in the ngrok.yaml file, including the port.
This example gets you started with connecting to databases using ngrok. Additionally, we’ve provided these comprehensive guides to help you set up the best configuration for your environment.
Batteries included
ngrok not only makes it easy to build connectors to resources deployed on-premises and in customer VPCs. It also allows you to offload security, performance, and high availability as well.
ngrok offers a wide range of traffic policy actions you can configure to shape the traffic that reaches the applications, APIs, and databases in your customers’ workflows. In addition to built-in support for security protocols such as OAuth, OIDC, mutual TLS (mTLS), and JWT authentication, you can add compression or rate limiting, to ensure your customer’s network is not overwhelmed. Finally, ngrok’s policy engine lets you use Common Expression Language (CEL) and JSON or YAML to create your own rules for incoming and outgoing traffic.
As for performance and high availability needs, ngrok’s global load balancer features points of presence (PoPs) around the globe, ensuring traffic is always routed through the PoP with the lowest latency. And if a PoP becomes unavailable, traffic is automatically rerouted to an operational one.
Get started today
For iPaaS vendors seeking to build connectors to on-prem resources, ngrok offers a comprehensive solution with a rich traffic policy engine and a robust global delivery network.
Sign up for a free account and start building connectors to access applications, APIs, and databases running in your customers’ networks. With ngrok, there’s no limitation to the kinds of data sources your customers can use to automate workflows.
